This year has not only started with a bang, but rolling hard and has yet to let up! Between planning a wedding, a pretty regular rotation of classroom visits & lessons, a full year of Media Bytes, and all the committees I've joined, I am spent! Oh, did I mention I am co-presenting with a good friend, Julie Gunther at San Diego & LA CUE's Tech Fairs? We'll be presenting on blogging in the classroom and why your students should be self-publishing for the world to see! More on that later, we'll be co-authoring a blog about the subject very soon.
Over the summer and the beginning months of school, we have changed Mobile Device Management Systems, moved to a Leasing/Purchase 2-year cycle for our 1:1 iPad program, implementing mindfulness and self-regulated learning strategies, building a Student Technology Support Framework, building technology skills plans, among many other things! I hope to write detailed posts soon. Stay tuned along with a new website :)
Sunday, October 18, 2015
Monday, August 17, 2015
Putting yourself in the shoes of a student.
Once school got out, I was inundated with professional development opportunity after PD opportunity! One conference after another and while I have had a running tab of topics I wanted to write about, admittedly, I have just been too wiped out to really do much else than prepare for the upcoming school year.
Alas, today was another PD workshop- processing with Khan Academy. Day 1 of a 3-Day workshop. Luckily, I was well rested when I arrived, but pretty quickly, my energy was zapped! Coding and programming are "not my thing". I know, I know..... "Jenn, anything can be your thing! All you need is a GROWTH MINDSET!"
Yea... I know and I didn't give up. But task after task, line after line of copying and then playing around with the numbers to see what happens if I change this or that, my frustration grew. My colleagues seemed to be getting it faster than I was; they didn't seem to be struggling. They seemed... interested in it. I, on the other hand, felt like I was right back in Geometry class struggling to comprehend the reason behind a proof and what theorems applied.
I think that sometimes it helps to step into the shoes of a student and put yourself into an extremely challenging situation. Feel the emotions of being frustrated. Give praise to someone who is getting it. After some playing with the various tasks from our instructor, I've come to the conclusion that Khan Academy for programming is quite useful. It's not as easy as some of these other "learn to code" programs, but we dove into learning the language. And now I have this to show (don't judge, it's not done yet):

A more formal write up to come, just wanted to share the experience.
Wednesday, July 8, 2015
Canvasing the world with Canva
I kept telling myself (and others) that my next post would be about mindfulness and how it fits in with students using technology, but truth be told, I've been spending a lot of time working on a website I'm building to help alleviate some of the burden from teachers of teaching their new students the iPad. Earlier in the 2014-2015 school year, I asked some of our faculty how they felt about student use of the iPad and some of the challenges they experienced. Many said the duality of teaching the device and content. So... I got to thinking, what if we front load the basics of the iPad during orientation and then use the iPad-specific orientation for hands-on exploration of common apps like Notability, Haiku Learning, Google Apps, and Apple apps? Well, that's what we're going to try. I'll let you know how it goes.
But why am I telling you this, you ask? Because in an effort to make my Weebly site look pretty and engaging, I'm creating a lot of graphics/infographics/signage with the program Canva. It's a web-based (and Google/Facebook single sign on capable) program and app that allows the user to create these amazing looking graphics using drag and drop features. One of our Research Librarians introduced it to me awhile ago and honestly, it took me some time to get used to it, but it reminds me of Publisher, only with amazing templates, graphics, and totally customizable right down to the ability to use customizable dimensions. I really like the way you can export/download your creation into a JPEG or PDF file. Canva also saves your work automatically and stores your finished pieces on the site. You can share your projects, making them public or not; there are various options to choose from: Instagram post, FB Headers, Blog Poster, inforgraphic, etc. And best of all? IT'S FREE (some graphics and templates do cost $$, but hey, the majority is free)!
If you've seen some of the "About Me" pictures on my site, you've seen some of the products you can do! You can upload your own photos, drawings, etc and spruce them up.
Check out some of the things I've been doing with it here (albeit it can be time consuming and tedious, but you'll get the knack for it in no time!).
Example: 9 Elements of Digital Citizenship graphic (Elements created by Mike Ribble)
Info from: Nine Elements. (n.d.). Retrieved from http://www.digitalcitizenship.net/Nine_Elements.html


Flyer I made for our Exploration Studio Stewardship, to be displayed on our rotating slide displaying in the Center for Teaching and Learning.

But why am I telling you this, you ask? Because in an effort to make my Weebly site look pretty and engaging, I'm creating a lot of graphics/infographics/signage with the program Canva. It's a web-based (and Google/Facebook single sign on capable) program and app that allows the user to create these amazing looking graphics using drag and drop features. One of our Research Librarians introduced it to me awhile ago and honestly, it took me some time to get used to it, but it reminds me of Publisher, only with amazing templates, graphics, and totally customizable right down to the ability to use customizable dimensions. I really like the way you can export/download your creation into a JPEG or PDF file. Canva also saves your work automatically and stores your finished pieces on the site. You can share your projects, making them public or not; there are various options to choose from: Instagram post, FB Headers, Blog Poster, inforgraphic, etc. And best of all? IT'S FREE (some graphics and templates do cost $$, but hey, the majority is free)!
If you've seen some of the "About Me" pictures on my site, you've seen some of the products you can do! You can upload your own photos, drawings, etc and spruce them up.
Check out some of the things I've been doing with it here (albeit it can be time consuming and tedious, but you'll get the knack for it in no time!).
Example: 9 Elements of Digital Citizenship graphic (Elements created by Mike Ribble)
Info from: Nine Elements. (n.d.). Retrieved from http://www.digitalcitizenship.net/Nine_Elements.html


Graphics explaining our expectations and responsibilities when it comes to using an iPad at school.


Flyer I made for our Exploration Studio Stewardship, to be displayed on our rotating slide displaying in the Center for Teaching and Learning.

The possibilities are endless. Our Ed Tech Specialist created buttons for Next Page on her Haiku class with Canva! I made my mother's day card with it and am planning on making my wedding invitations using it too!
*Special shout out to Jolina Clement (@jkclement) for an awesome session on using Canva, piktochart, and more! Brand your class, brand yourself.
Wednesday, June 24, 2015
You and (i)Teach Pt IV (The Group Work & Self Regulated Learning)
Before we headed out to the conference, those of us in the CTL (Center for Teaching and Learning) got together and brainstormed a topic we could address while at the iTeach San Domenico conference. We threw around notetaking on the iPad, identifying which device to use, etc. but ultimately, all those things fall under the umbrella of Self Regulated Learning.
What is it you ask? We were trying to figure it out too! It turns out self-regulated learning is not as widely a researched topic as we had thought it was. Honestly, the passerbyers were impressed with our conversations and surprisingly, even our keynote, Roni Habib, was unaware of the term. We came to define it as the process by which one can regulate their own learning and become effective learners.
Elements of Self-Regulated Learning
Effective learners are self-regulating; analyzing task requirements; setting productive goals; and selecting, adapting, or inventing strategies to achieve their objectives. These learners also monitor progress as they work through the task, managing intrusive emotions and waning motivation as well as adjusting strategies processed to foster success. These are the students who ask questions, take notes, and allocate their time and their resources in ways that help them to be in charge of their own learning (Paris & Paris, 2001).
For our purposes, the self regulated learner will be able to identify which device is appropriate for a given task, identify which method/practices work best for him/her as a learner (audio, visual, kinethestic, ipad/laptop/paper&pen). As their educators, how do we do this? How do we make students realize that they are responsible for their own learning and it does not "happen" to them. They are an active participant and ultimately, in charge of their learning. Furthermore, how do we inspire initiative and motivation? Are those things we can inspire or teach? Are they inherent? Carol Dweck promotes Growth Mindsets which would tell us that, yes, you can always develop these as long as you try, practice, andd receive the right feedback.
The group work sessions were amazing and I feel so fortunate to have had the opportunity to brainstorm and work with such an amazing group of people. While we had very productive conversations, we were not able to come up with a clear and concise plan that we would have been able to, realistically, return to our school and hit the ground running . We did, however, develop an action plan that is realistic given what is already locked in for next year.
Part of the action plan was the decision that we need to guide our students building a tool box to become better learners. The toolbox theoretically contains strategies to cope with failure and strategies for resilience; strategies for agility and perseverance; the ability to be vulnerable with other students (mindfulness and growth mindset); universal truths of learning: strategies for self-assessment (self identify what kind of learner are they, learning habits for specific tasks), time management and organization, goal setting; identifying and discussing processes of thinking; and last but not least, develop and practice the skill of asking questions. And this "toolbox" will, of course, grow and morph over time.
The first step in creating this toolbox, is creating a pilot for our 7th graders (and their teachers). Get all teachers onboard. Reiterate the idea of mindfulness (a theme from this school year) to help pave the way toward developing these inward facing skills, scaffolding these skills by introducing their development to the 7th graders upon their entry to our school and throughout the grades as they move up. We are going to create a study habits page for students on our LMS, Haiku Learning, for reference. I will be creating study habit tip slides for our CTL display to create an opportunity for accidental and indirect learning. But, more importantly, we are creating a page in Haiku for teachers to help them create spaces and opportunities for students to develop and practice self regulated learning.
I'll keep you posted on how this process works and the group will be following up to reiterate and revisit the ideas.
If you are interested in reading more about self regulated learning and self directed learning, please see the links below and feel free to share your resources!!! I'd love to read them!
Resouces:
http://www.facultyfocus.com/articles/teaching-and-learning/secret-self-regulated-learning/
https://teal.ed.gov/tealguide/selfregulated
Friday, June 19, 2015
You and (i)Teach Pt. III (The Sessions)
For the first time, I didn't follow my natural instinct/unconference rules and let my feet do the talking while at iTeach. For those not in the know, in unconferences such as the EdCamp network, if you feel a session isn't what you were expecting or doesn't touch on your needs, you just get up and go to the next one. I guess I wanted to give everyone the benefit of doubt and I did take something away from every session.
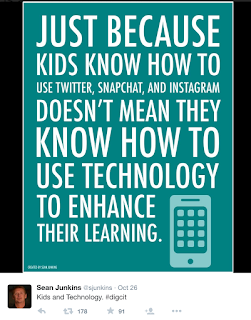 The sessions were how they always are... some are okay and some are just fantastic. I attended a few in addition to the group work we embarked on. In "The Great Debate: Digital Reading and Digital Notetaking" with Jennifer Gaspar-Santos, not only did we debunk the mythical "digital native" belief that our students have grown up surrounded by technology, so they must be proficient at it. But Oh! on the contrary!!! Students need to be taught skills and given opportunity to develop them over time; they need to be introduced, taught, and have skills scaffolded when learning a new app or "on boarding". You can't just throw Explain Everything at a 7th grader and expect them to figure it out 100%. I mean, they'll figure some things out, but there is a learning curve. Remember, we're trying to set our kids up for a transformative learning experience after all.
Now, I must admit, I was one of those who up until about a year ago, figured kids could literally pick anything up and figure it out. That was probably because I'm able to do so with ease, but I am not everyone and this was probably my biggest misconception (but at least I can admit when I'm wrong).
 Did you realize that our Middle Schooler know what Tinder is? Do you know what Tinder is? In the session entitled "How to Host a Successful Digital Citizenship Week" by Merve Lapus, told us they do and now that I think about it, I know for a fact I've heard my high schoolers mention it, but not my dear sweet Middle Schoolers. Either way, kids are being exposed to so much media
Some of the suggestions Merve gave, like holding a panel, I've tried and failed (Woo-Hoo*), but at least I tried! I thought about it and would like to do it again, but maybe next year. I didn't know the culture of my school, nor the students, which made it really hard for them to commit. But there are things I can do and I really want to have a successful Digital Citizenship Week this October. To do so, Merve suggested to identify goals for the year and integrate those into lessons (which I'm desperately trying and advertising my expertise a little more now), post readings and blog articles in a space that students will have access (our LMS, Haiku Learning, is the perfect place along with our CTL boards), and finally, partnering with someone who can help and for me, that's our Dean of Experiential Learning. I realized that she is the organizer to end all organizers of student events at my school and her partnership is what I need.
While I did attend Roni Habib's amazing session Tuesday morning after our keynote with him, I'll touch on it in my Mindfulness post that is in the works. I will share a wonderful tool he introduced us to though- Edpuzzle.com. Create or find a video on Youtube (but don't make it more than 3 minutes, kids won't watch it) and insert open ended questions within the video. Every time it's question time, the video stops and the viewer must answer the question. And best of all? it's FREE!
 The sessions were how they always are... some are okay and some are just fantastic. I attended a few in addition to the group work we embarked on. In "The Great Debate: Digital Reading and Digital Notetaking" with Jennifer Gaspar-Santos, not only did we debunk the mythical "digital native" belief that our students have grown up surrounded by technology, so they must be proficient at it. But Oh! on the contrary!!! Students need to be taught skills and given opportunity to develop them over time; they need to be introduced, taught, and have skills scaffolded when learning a new app or "on boarding". You can't just throw Explain Everything at a 7th grader and expect them to figure it out 100%. I mean, they'll figure some things out, but there is a learning curve. Remember, we're trying to set our kids up for a transformative learning experience after all.
Now, I must admit, I was one of those who up until about a year ago, figured kids could literally pick anything up and figure it out. That was probably because I'm able to do so with ease, but I am not everyone and this was probably my biggest misconception (but at least I can admit when I'm wrong).
The second session I attended entitled "Outcomes at of a 2:1, three year iPad/Laptop program" was also led by Jennifer Gaspar-Santos from Casteleja School. Again, Gaspar-Santos stressed the importance of onboarding. The idea that you can bring in anything without training or practice or strategies is ridiculous. For example, one of her teachers made an incredible iBook using iBooks Author. When the students didn't use it, she couldn't understand, until she realized the students needed to learn to read the book- flip through pages, click on audio/video clips, use interactive segments. We tend to just assume... but you know what they say about Assume.....
 Did you realize that our Middle Schooler know what Tinder is? Do you know what Tinder is? In the session entitled "How to Host a Successful Digital Citizenship Week" by Merve Lapus, told us they do and now that I think about it, I know for a fact I've heard my high schoolers mention it, but not my dear sweet Middle Schoolers. Either way, kids are being exposed to so much media
 Some of the suggestions Merve gave, like holding a panel, I've tried and failed (Woo-Hoo*), but at least I tried! I thought about it and would like to do it again, but maybe next year. I didn't know the culture of my school, nor the students, which made it really hard for them to commit. But there are things I can do and I really want to have a successful Digital Citizenship Week this October. To do so, Merve suggested to identify goals for the year and integrate those into lessons (which I'm desperately trying and advertising my expertise a little more now), post readings and blog articles in a space that students will have access (our LMS, Haiku Learning, is the perfect place along with our CTL boards), and finally, partnering with someone who can help and for me, that's our Dean of Experiential Learning. I realized that she is the organizer to end all organizers of student events at my school and her partnership is what I need.
While I did attend Roni Habib's amazing session Tuesday morning after our keynote with him, I'll touch on it in my Mindfulness post that is in the works. I will share a wonderful tool he introduced us to though- Edpuzzle.com. Create or find a video on Youtube (but don't make it more than 3 minutes, kids won't watch it) and insert open ended questions within the video. Every time it's question time, the video stops and the viewer must answer the question. And best of all? it's FREE!
You and (i)Teach Pt. II (The Keynotes)
The conference overall was great. Our hosts, San Domenico School and their staff were amazing. I've had the pleasure of meeting and speaking with Jason and Callie at previous conferences and they are just simply fantastic. It was great getting to know four other colleagues- two of which I work with regularly (my supervisors), one (a middle school classroom teacher) I work with regularly on planning, and an upper/high school classroom teacher I have had very rare moments of interaction with. My consensus? They are all amazing and brilliant and so utterly talented it's crazy.
Monday's keynote speaker to kick things off was Merve Lapus from Common Sense Media. As you are probably aware, I am a fan of the organization primarily because they are doing a great job spreading the word as to what digital citizenship is and lessons on how to integrate it into your curriculum. However, this keynote speech was more about the use of educational technology in an effective manner in classrooms- which obviously, I can get down with. My main take away from Merve's speech was that we have to be cognizant of those who fear they "won't" or "don't" get technology. We must rethink what is possible- engage more alternative assessment, try to be mindful and intentional with your tools while trying to teach above the line because, essentially, "we want to create the most transformative and effective learning environment for the world our kids are in" (Lapus, 2015). As educators, it is important that we lead by doing. If we ask our students to keep a "can do" attitude, or growth mindset, and reflect on their failures, then it is imperative that we do as well... and dare I say, even in front of them? Or discuss our processes with our students?
Models of Integrating Technology


The TPACK Model is where technological, content, and pedagogical knowledge intersect with one another. Dr. Matthew Koehler's definition can be found here.
Roni Habib was Tuesday's keynote and while his main topic was mindfulness and technology, he hardly did anything related to that! In fact, he had us up on our feet with interactive activities like as passing an imaginary ball to one another, doing so with a unique sound, etc. designed to create an environment where students feel safe, yet vulnerable. We began to act silly and laugh within minutes and immediately, we all saw how this affected the camaraderie of the group.
I don't know about you, but 8th-12th graders are not about acting silly anywhere outside their comfort zone, so in essence, it was basically "LET'S CREATE THE COMFORT ZONE HERE!". I can imagine the success of a class if it is introduced especially within the first week of school (or days if you can swing it), you can create an environment that is not only student centric, but a safe place for failure. If you combine this with meditation or breathing exercises (even weekly), I can only imagine how much better classroom management would be... especially after lunch!
Another focus of Habib's activities was to be PRESENT! You can't check your phone or social media profiles if you are anticipating an imaginary ball that is going to be passed to you at any moment! You'll let your classmates down! My colleagues and I enjoyed Habib's keynote and his session quite immensely. So much so, we'd love to have him speak to our students.
You and (i)Teach 2015
A group of 5 individuals from my school, including myself, attended the iTeach 2015 Conference at San Domenico school in Marin County. This was presented to us as an alternative to the Hillbrooks School iPad Schools conference of last year, but whoa.... what an incredibly opportunity!
First off, we beefed our group up to 5 because if you had a large enough group, you had the opportunity for a real life group project that our students tend to hate so much. You were provided the opportunity to identify an issue you'd like to work on and go up a day early, provided a space to focus and work uninterrupted, provided a guide or facilitator outside of the one your group designated... all while in this majestic campus surrounded by trees and hills and cabin-like dorms and buildings! AH-MAZING!
After that designated group work day, two days of workshops and lesiurely breaks followed. The workshops and discussions focused on iPad/app/tech specific tools. The overwhelming consensus from our group was that for once Kahoot was at the forefront (you may remember Kahoot from a few posts ago; my mom always said I was a trend setter), Adobe Voice was picking up steam, and we were pretty well in the know of current trends.
Stay tuned for the sessions reflections and major take aways.
Stay tuned for the sessions reflections and major take aways.
Thanks again San Domenico School for your hospitality! Gorgeous campus and an amazing garden....


Saturday, June 6, 2015
School's Out For Summer! (Read this in Alice Cooper's voice)
My first year as a Student Technology Integrationist has come to an end. I learned so much and had the pleasure to work with so many wonderful people with fantastic ideas! I had never worked much with iPads prior to this since I was primarily focused on Data Management and Analysis before, so being thrust into the world of Educational Technology in a school setting after finishing a Masters program has been so exciting.
I feel like I really have filled a toolbox with strategies in teching up lessons, app smashing, using alternative assessments like movies or storytelling, various apps, different digital citizenship lessons and how to integrate them into already existing lessons. So many things! I look forward to writing more about them over the summer.
Moving forward, I am learning and experiencing the adoption of a new Mobile Device Management system (we decided to go with Airwatch) and how that process plays out. I am enrolling in an online Tinkering course and looking for a Design Thinking course since I will be involved in the new Makerspace Studio next year. This summer I will be attending a couple conferences: iTeach and High Tech High Summer Institute. At iTeach, my team and I will be focusing on how to build more of a self-regulated learning culture and what strategies make up a self regulated learner. Exploring the differences between self directed learning and self regulated learning. I am excited. I feel like I took this year off from school and really was just trying to get used to the new environment I was entrenched in at my new school, but I am ready to move forward and continue my life-long learning journey.
Oh and I got engaged :) Life is great.
Friday, May 15, 2015
Stop Motion Susustudio
Recently, a Physics teacher came in to the CTL with this idea for his students. He was going to administer an assessement, idenitfy students weak areas, and assign them those topics to create a tutorial using stop motion film making.

So, I never took Physics. I don't know anything about it. Even when It was rolled into my Physical Science class, I had a tendency to check out. The instrucotr wanted an example to show the students and an activity for them to do as the guided practice, because duh... That's what we do!
I had already been thinking about exploring this world and found the free app for iPad, Stop Motion Studio, but somehow lost all time to play with it ahead of time. The Ed Tech Specialist, Lisa, and I sat down and learned the app in about 10 minutes. Then, we brainstormed an idea for our movie... We were going to make a stop motion movie on making a stop motion movie!
Stop Motion Studio was actually pretty easy to learn and the price is RIGHT! There is a paid version that allows you to upload your photos and change themes, but it's not totally necessary. We had one person write out the post it notes and place them, and the other snapped photos. Once we were done, Lisa exported the video to her camera roll and Air Dropped it to my iPad. From there, I pulled it into iMovie where I added my voice over, stock music, and slowed the frames down a bit more since there were parts that were still too fast for my eyes to read the post its. After that, I reviewed it and thought anout how i wanted to write this post and so I added a scrolling credits slide with an app called, Scrolling Credits. Now, let me say, most things technology are intuitive for me, but that app had me frustrated. I ended up figuring it out after 10-15 minutes, but that is too long for any of my students. Anyway, saved it as a photo and added it to the end of my movie.
I love the idea of using stop motion as part of a process of learning, especially for something that requires multiple steps. The use of stop motion requires the user to take photos along the way and if the student is doing something, taking a photo, then doing the next step, taking another photo, and so on, the student has to really think about what they are doing and why. As educators, we know that people kearn and retain more if they DO rather than just read or discuss.
Monday, May 4, 2015
You may have noticed...
If you are following my blog, you may have noticed some random videos with not much explanation being posted. Now, this is not some random person posting and hacking my account. Rather, they are products of my lessons for my school's Challenge Based Learning projects. Earlier I posted about the trial and tribulations of posting videos to Blogger and what difficulty I was experiencing. Well, once I accepted that there was basically no way around posting videos from an iPad to Blogger other than through Youtube, I began my lessons. In an effort to be authentic, I went through the process step by step with them (and there are a lot of steps when working from an iPad), inevitably posting real videos from my camera roll. Rather than deleting them, I figured "why not just leave some of the them?". I'll add some explanations to the videos since many of them were made with different apps and one of a cool mini-maker fair I attended.
Do you have stories of making examples for students? I'd love to hear!
Do you have stories of making examples for students? I'd love to hear!
Friday, May 1, 2015
Jenn's Monster Video
UPDATE: I posted this video on my blog as an example of how to upload a video to Youtube from an iPad and then take that video and put it on Blogger.
Originally, this video serves as basically my first time working with Explain Everything. I attended a workshop in February by Ed Tech Teacher at their iPad Summit. The workshop had us actually working with apps our students work with every day. Surprising, I had never done anything with it while my students are creating tutorials and all kinds of cool things!
My findings? Explain Everything is awesome! It's a great screencasting tool and allows the user to create different slides, record voice, record animations, etc. A student of mine who has used it for math tutorials said, "Yeah, it's pretty fun".
Thursday, April 30, 2015
Tinkering magic
Another video used to demonstrate uploading a video to Youtube and onto Blogger.
I took this video of the display stand St. Matthew's Makerspace had at LACOE's Digital Educator Day 2015 workshop. It was really cool to see in person. I can't wait until our makerspace is getting on a roll.
Wednesday, April 29, 2015
Hello kitty chatterpix
UPDATE:
This is another demonstration video of how to upload. However, it's also a great example of the app Chatter Pix! Chatter Pix is so much fun. Take any photo, use your finger to cut a line, record the voice, and add stickers. Then, save/export to camera roll and you now have a fun little animation!
This would be great for kids and creating stories. You can create one of these, import it into Explain Everything, create a tutorial with this or edit them all together in iMovie as some of our Physics kids did! Super great!
My cat coco
UPDATE:
This is one of the first videos I used for my demo in uploading videos to Youtube to then later uploaded to Blogger. Although I didn't actually show the video to my kids, they certainly asked! I also created this using a photo of myself and my cat, pulled it into Chatter Pix and modified. I cannot stress how much fun this app can be. I saw a school present on this app a couple months ago; they had their students talk out the geometry concept using a cube shape character. The possibilities are endless.
Tuesday, April 21, 2015
Posting a video from your iPad to Blogger...
The trials and tribulations or shall I say, limitation, of working on Blogger and Drive is that you cannot upload a video from your Drive account, which is crazy since Blogger is a Google App... Can we get that fixed please? Thank you.
Yes, you can upload from a computer. Yes, you can embed from Youtube. But you can't upload a video from your iPad or Google Drive.
This is a problem for my CBL blogging kids. One work around we are looking at is emailing it as a comment. This posting is a test of that... so let's see. [There were several tries before anything happened here... and a hard furrowed brow]
[UPDATE: I tried using the Mobile settings to email the post to oneself from camera roll and iMovie and I kept finding that the files were rejected for exceeding the file size. Tried it from the Mail app, GMail app, emailing straight from iMovie with a file size of Medium (360MB), emailing from camera roll... NOTHING. I finally downloaded the video file to computer's hard drive and uploaded it from there and yet, it was still not working smoothly. It uploaded but was caught in the loading/buffering for what seemed like an eternity.
I know you're probably thinking, "Why not just upload it to Youtube?" Well, there were some issues that we encountered last year that resulted in students having their videos/accounts removed or suspended, respectively. We were hoping to avoid that this year and our Ed Tech Specialist saw what she thought would be the solution at a conference over the summer. But alas, it seems as though Youtube is the way to go.
I will now recede in defeat.... Blogger... please fix this. It is such a headache for those of us with iPads.
Have you figured out a better way of doing this? How do you get your kids to upload videos to Blogger?
Gawd, I love the internet
There have been two times in the last two days where I found myself thinking (and saying out loud), "Gawd, I love the internet". The first was when I was introduced to Instructables.com and the second when I was researching a feature a student wished to incorporate in his Weebly page. With a simple search of "linking slideshow photos to store", I was brought to the press release for the feature, a step by step guide, and much, much more.
Being the first point of reference for my students' questions and needs, I have encountered many issues. Everything from lost Notability notes to disabled Google accounts, to disabled iPads to frenetically flashing iPad screens, you name it.. I've probably seen it. But every once in awhile a student brings something to me that I'm not entirely sure of and today was that.
I have taken on the task of teaching my students, all 500 of them, troubleshooting methods. Some of them ask, "How did you get so good at computers and technology", and I never really know how to respond. It is really just exposure, a willingness to fail, and like everything else, knowing where to look: Google. Over the last week I have encountered a few problems where I didn't know the answer or couldn't figure it out on the spot, so I just told the students I would get back to them. Once they left the office, the furious Google Searching began and before you knew it, I found exactly how to do what they needed to do.
Along with Googling for troubleshooting, I also put together How To directions for our students and faculty members. If I can't find a clear "how to" somewhere on the web, I will walk myself through the process taking screen shots, upload photos to Drive, pull them into Drawing, and annotate them. Then pull them into a Google Doc with step by step directions and inserting the photos as reference.
Here is a snippet of the directions I made for our air printing system and downloading iTunes U courses:


Have you figured out a better way of transferring the knowledge of troubleshooting?
Subscribe to:
Posts (Atom)
